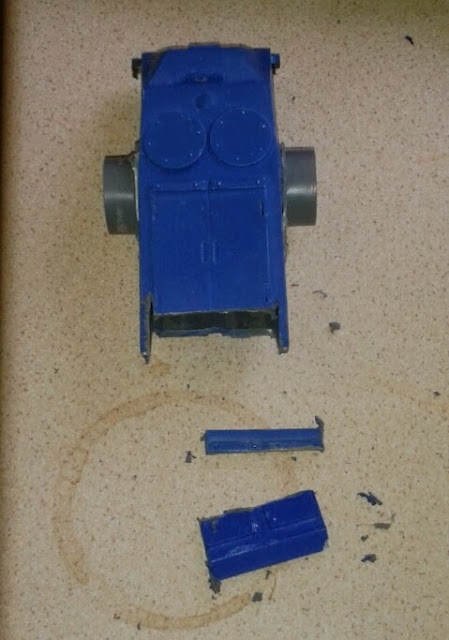
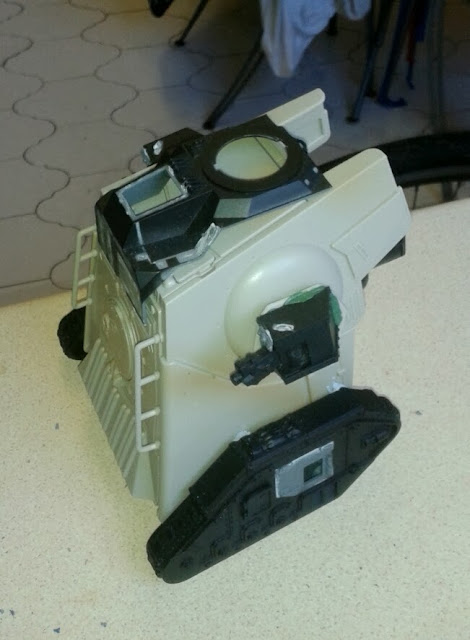
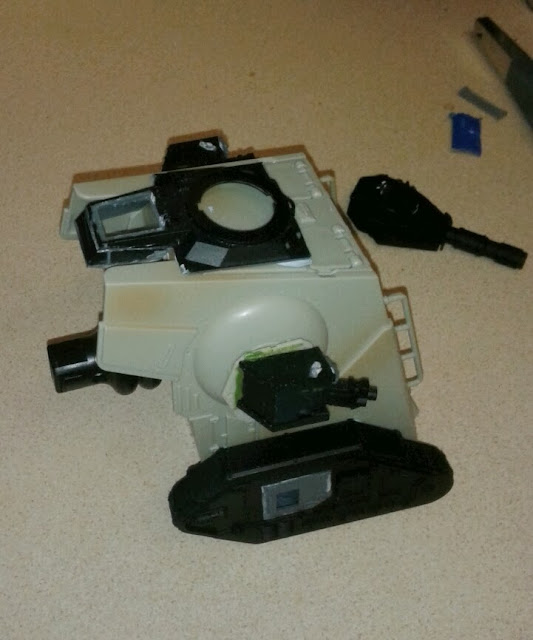
So after getting the left front track done over the weekend, yesterday I got the right track spaced and fitted and added the bolters to the to the casement with blu tac, will look at maybe magnetising them next as well as plating the sides to make it look manufactured and try to blend the join between the AT ST head and the home made body. I'm also looking at getting a couple of flame storm cannons in January and swopping the front Heavy Bolters for those and moving the sponson forward and down to a more tusk like position and then adding a shiled of some sort around the front pair of heavy bolters to give the inpression of ears.
Wednesday, 25 December 2013
Monday, 23 December 2013
Sinister side started
Managed to squeese in 5 minutes on Project M today before I went outvto a (ha!) mammoth 13 hour shift (really how is giving me a longer working day doing me a favour even if it is in the town where I live? It's not like I can go home at any point,). So started spacing/squaring up the front tracks on the Mastodon, got the left sinister side done before I had to set off for work. Minor finessing issue of getting the right side done before I can try then both and then I also need to check that the tracks are level on the front. Think I've broke the back on this one; not much longer to go and it'll be ready to paint.
Sunday, 22 December 2013
22nd of December Mastodon WIP
Was on my weekend off and amid getting Christmas ready and family visiting I got the casement done on the Mastodon, took it out back got 10 Marines up top and photographed it.
Saturday, 14 December 2013
Back Plate
Not got a lot done this week, just the decoration on the arse of the tank. All the bits are from the Leman Russ kit although I'm thinking the fuel drum is not a good idea.
Sunday, 8 December 2013
Mastodon Moving On
Glued the track sections to the back compartment today and tried the Soylent Green from GW. While good I think you need to find the right problem to use it on which I didn't.
Progress On Project M
Not much progress no, but a small amount. Added some fairing under the turrret to hide the foam board. With a bit of luck tomorrow should see the out riggers added so the tracks will sit on sides of the head squarely. Tomorrow should also see the gaps filled in with some liquid green stuff, mostly to see how it works.
Tuesday, 3 December 2013
WIP Mastodon, Techpriest Enginseer
So tiny bit done on the Mastodon around working stupid shifts at work. Clad the sides in plasticard will cut some bits out for plating the sides and doors for access. Will get a castlement done for round the top and may just move the roof access hatch to the back angled plate.
Also read the email from Wayland Games with the Bombshell Babes and saw this little lady, think I found my Enginseer.
Wednesday, 13 November 2013
Mastodon Latest WIP
Few days off work and I'm already moving on with this build, used up the last of my super glue last night sticking the back plate and sides to the base and used some of the green stuff to fill the gaps where the fit is less than perfect (all of them). After gluing the angled plate I'd fitted on roughly was massivly undersized so I flipped that and put it underneath as a brace where the body mates with the head, that was last night. This morning I cut a new angle plate and then started to finess myself a top deck. For this one I actually got the tape measure out and did some vaugely accurate measurments, but my cutting was a touch up. So with some remedial trimming and gently knife work to trim out the foam but leave the plastic coat I got the top deck on. As it stands now I can fit 10 marines on there, but I still need to fit a casment around the top to give the riders cover.
Bottom photo; while out working yesterday I saw this lego kit, the Mandolorian Speeder, had to double check but if you squint you could pass this off as a Forge World Javlin Land Speeder I think, and half the price.
Wednesday, 6 November 2013
Good Week For Working
Not so good for time on the hobby, 49 hours and 6 straight days. Plan is to get down to Granthams to get hold of some foam card to start the Mastodon body.
Other plans.
I had always intended to sell the Mastodon and keep the Titan but now I'm thinking of selling the Titan and keeping the Mastodon and add a couple more as Company Transports for The Lions Blades or maybe selling both and using the cash to make the 3 Mastodons I'm planning on. Beyond that and using those 3 to get used to messing around with foam card and plasticard I'm thinking of possible starting to sell them. I know I'd not be able to use the GW bits if I was to sell them on so I'd have to make tracks, turret and the rest out of foam and plasticard with enough divergence from GW to get away with it and also use a different name as I'm fairly sure Mastodon will be a registered name, that bit is easy as I've already looked up the evolution of the Elephant and it's family tree and seen a couple of branches that died out that I might use the names of.
So on my day off I got on with cutting up the foam board to make the body of Mastodon. I started off with a base and made it a bit too long, along with the sides, it took some work to at first and it wasn't a looker, with the Russ tracks on the front it was not good. I flipped the tracks around and found that they looked better that way than I had thought but the extra weight kept pulling the body apart and with the with the look of body I thought I'd chop it down a bit, I orginally thought to cut 2 inches/50mm out of the body, but going with the baby steps idea I thought it better to cut half of what I wanted to out as I can always cut more off, but if I cut too much out it would have been a waste and I'd have to start again with another sheet of foam board. After the cutting I spent a bit of time finessing plates and getting them to fit. With the heavier tracks on the back I was only able to stand them next to the back for the photo but I think it looks better like this.
Saturday, 2 November 2013
Playing With Power Tools
So I borrowed a Dremmel off a mate of mine last night and had some fun today, Saturday, cutting up the Rhino and the turret mount for the Leman Russ. I started on the Rhino cutting into what had been the front plate. I got to work on the cut outs with my file tiding up the cut outs, I realised that I hadn't taken into account the brace that the head had fitted to so I got the Dremmel out again and cut down a slit so that the hull actually angels downwards. I spent some more time playing with file to get a good fit. I'm now waiting on the magnets to arrive from Hong Kong to fit the hull to the shell properly. While talking to my mate last night we got onto to the weapons I'm getting, I was planning on getting the guns from Forge World but my mate suggested that they'll be over balanced as the mounts are near the back, if I make them I can have the fittings more central and get the guns back ends to help counter balance the forward weight of the head. Onto the Mastodon; I wanted a turret on it and am using the Leman Russ for this, as I think that this rather than a super heavy gun is more in keeping with the transport role of the Mastodon, a Baneblade type weapon while an option would take up way too much space and while I see a Big Fracking Gun version being made ( 4th up as I intend to sell the first on ebay to to pay for bits to make the next 3. This one will have a smaller transport capacity of say 15 with maybe an Earth Shaker Cannon mounted on the back to act as a Command Version which was a suggestion from someone in the Imperial Guard group I'm in on Facebook, the Command Squad and maybe the an elite squad or 2 to act as bodyguards will be transported in this one. So I started off by fitting the turret plate on the ATST the wrong way round. To get a better fit I cut off the flat end plate. This looked okay but needed a bit of finessing, now finess is an alien concept to someone who lived by by the ethos the only 4 tools you'll ever need are WD40, Duct Tape, The Chisle Of Ignorance and The Lump Hammer Of Brute Force and I cut more off than I intended to. Luckly glue, green stuff and a coat of paint should hide that little mess. After fitting it to the top of the ATST it looked bad, so I turned it round and had the "crew hatch" at the back, this also helps to hide the extra cut I made by mistake. The turret looks good on it this way round, and I look forward to getting foam card this week to make the body of the Mastodon and the weapon arms on the Titan. I think I'll be adding some magnets to these to help hold the weight of the weapons and not just hope that the rubber nut from the Zoid will hold it on.
Wednesday, 23 October 2013
300!
Wow 300 posts and people all over the world are reading them, makes me feel good to know my messy living room has been viewed world wide!
Right back on track, I had a glass is all ways full moment the other day when it comes to the cockpit for the Titan; I'm getting an old Rhino for it's tracks, I need a cockpit for the Titan. I'll have a Rhino hull that could well be going in the bin, can I not use that as my cockpit/ head? Will need magnets of course for this and the front panel in my bits box, but I think I could get this to work, also I could get the hurricane bolters as anti infantry weapons on the sides of this. The image in this post is the, I belive to be, one of the first pair of Titans built for 40K, back in the days before Apocalypes had even been thought of as a concept. I know 2 where made, 1 Loyal and 1 Chaos but beyond that I don't know much about this model.


